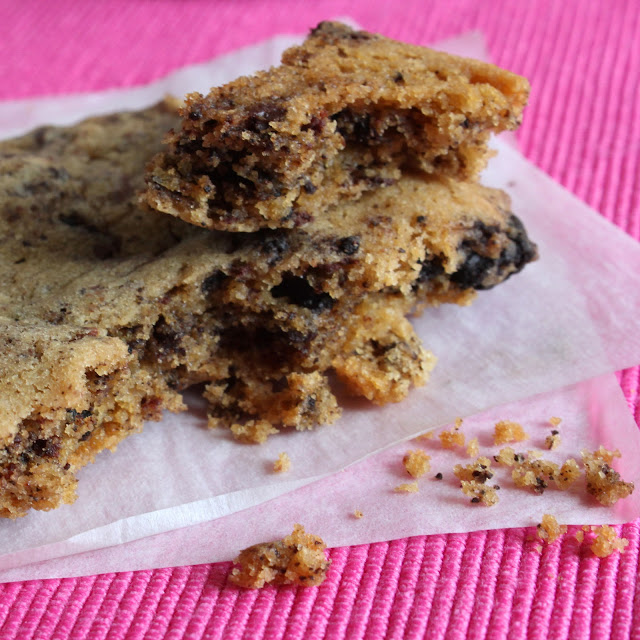
I found a pretty amazing recipe that I tweaked a bit to conform to my liking. The resulting cookie is a not-to-sweet base that is enhanced by its chocolate additions. I have realized that this is quite a factor in having a great tasting cookie - lessen the sweetness of the cookie itself and let the sweet additions do the talking. The cookie base is just a vehicle for these add-ins anyway. Also, while baking these cookies after letting them refrigerate in the fridge for at least 24 hours does bring about an awesome cookie, if you are highly impatient as I am, and need to bake these cookies asap, you can do so with a pretty amazing result. I only refrigerated half of my batch (the other half went in the freezer - who needs 30 chocolate chip cookies sitting on their counter??) for about two hours before I heard them calling my name. So, I preheated my oven and baked them and the 15 minutes it took for me to do that was trying enough on my patience. But, boy was it worth it.... However you eat these cookies - piping hot from the oven (I had to, of course), cooled to room temperature, dunked in milk or coffee, a day or two old, they are superb. The dark brown sugar in them really brings a deep caramelly flavor to the cookies and the nutmeg completes the chocolate chip cookie experience in a way I cannot describe in words. Tasting is believing, trust me. Just remember that a chocolate chip cookie is only as good as the quality of the additions you use, so try not to use your run-of-the-mill grocery store chocolate chips. This time around, I used chopped Dove chocolate bars (both dark and milk) and a handful of crushed Oreo cookies. When I say you need to make these, I am not kidding around. Do it. You won't be disappointed.
A note on the frozen 1/2 batch: I froze this batch without any add-ins because I couldn't decide what I wanted to use and didn't want the pressure of making that decision. So, when I'm ready to bake them, I'll bring the dough to room temperature, fold in whatever additions I feel like using and then bake off as normal.
My Favorite Chewy Chocolate Chip Cookie
(Inspired by and slightly adapted from BraveTart's Chewy Chocolate Chip Cookies)
Yield: just under 2 lb dough (without add-ins) or about 30 1.5oz cookies (with add-ins)
12.5 oz all purpose flour *(see note below)
8 oz unsalted butter, room temperature
6 oz dark brown sugar (don't use light brown sugar!)
3 oz white granulated sugar
1 t baking powder
1 t baking soda
3/4 t salt
1/4 t nutmeg, grated
1 T vanilla extract
1 egg + 1 egg yolk
6 oz chocolate (I used a combination of milk and dark chocolate)
10-15 Oreo cookies, crushed
In an electric mixer, mix the butter and sugars together until they come together in uniform consistency. This should take about 30-45 seconds. Do not "cream" the butter and sugars as you do not need that excess air in our cookies. Next, add in the baking powder, baking soda, salt, nutmeg, vanilla, and eggs. Mix well to bring together the dough, making sure to scrape down the sides of the bowl. Add the flour and pulse the mixer so as not to over-incorporate the flour and toughen the cookie. I like to take a spatula and mix by hand toward the end. Fold in any add-ins you wish to use. Divide the dough into two discs and wrap with parchment and plastic wrap. At this point, you can place the discs into a sealed plastic bag and freeze them for up to 6 months. Otherwise, refrigerate the dough for up to 24 hours. When you are ready to bake them, preheat your oven to 350F and set a rack in the middle position in the oven. Remove the dough from the fridge and pull off 1.5 oz portions, roll them into balls and place them on a parchment- or Silpat-lined cookie sheet. Press down on the cookie balls to flatten them a bit, while making sure to leave about 3" between each cookie as they will spread as they bake. Check the cookies after 10 minutes, making sure they are not baking too quickly. Then bake for an additional 2-3 minutes. The cookies are ready when they have set up around the edges with a lightly toasted color to them, while the center of the cookie still looks a bit soft and underdone. Take out the cookie sheet and let it rest on the counter until the cookies are fully cooled or throw caution to the wind and eat them hot! It may very well be worth the pain. Or be good and let them rest for 10 minutes. Then, eat them slowly and deliberately, enjoying every last bite. Enjoy!
*Note: If you don't own a kitchen scale, you should consider investing in one. They are fairly inexpensive (for around $20, you can find a good one). Baking is a science and measuring by weight is crucial to proper ratios and consequently, high quality baked goods.


No comments:
Post a Comment