Hi friends,
As the new year comes to a close, I wanted to take a moment to tell you all how awesome you've been in supporting this baking and blogging endeavor I've been on this past year. It's been a great ride for me, but undoubtedly wouldn't have been as such without all of my friends and family there to sustain me.
My husband's honest critique of everything that comes out of my oven helps me more than anything else. We all need someone in our lives to tell it like it is. And he's my guy. As much as what he says may not always be what I want to hear, it's what I need to hear and that is priceless. Thanks, J.
My children are awesome, the best kids a girl could want. They've been patient through all my baking hours logged in the kitchen and so supportive (my daughter is constantly advertising my goods in school and my son constantly tells me my cakes are the BEST)...! Thanks, kids. It means a lot.
As 2012 approaches, my blog hits are nearing 1000 and after these couple of post will most probably excede 1000. Thank you all for making my blog a part of your days. I hope you enjoy reading it as much as I enjoy maintaining and adding to it. I love being in the kitchen and creating fun, creative and delicious treats and I'm so glad I've friends to share that with. Hopefully this next year in the kitchen will be as fun and exciting as the past one has been and I hope to share those moments with you as well.
So as the year closes on us, I wish all of you and your families a very Happy New Year in 2012 and much love, happiness, good health, prosperity, and peace in spirit.
Love,
Leelabean
Saturday, December 31, 2011
A Smashing Birthday!
It's the week between Christmas and New Year's - a time for thinking back on the year past and pondering the year ahead. It's a time for celebration, enjoying the warm holidays and ringing in the new year. In my world, along with all this, it's also creating two cakes for some friends' birthdays being celebrated this week.
The first was a Lego cake for some family friends whose sweet and dear 1-year old absolutely adores these fun building blocks. The birthday boy's mom, Carolyn, is a photographer with her own blog and business. Please check her page out, as she is extraordinarily talented! She photographed our family recently and I just adore every single picture she took! I will be posting some pics from our photoshoot very soon so check back for that.
The cake was a first for me in that it had to be egg-, dairy- and nut-free, not to mention I had never designed a Lego cake before.
I created a carrot cake recipe which used flax seed as a replacement for eggs. Flax seed meal is a great alternative to using eggs in baking. One heaping tablespoon of flax seed meal blended with 1/4 cup of cold water until it becomes the consistency of a beaten egg (about 2 to 3 minutes) is the way to use this substitution. My friend wanted a smash cake for her son - a mini-spin off of the larger cake. If you've never heard of smash cakes, they are mini cakes that are created, usually for 1st birthday parties, so the birthday boy or girl can enjoy his or her piece of cake without destroying the actual cake. Most often, they are mini, complementing versions of the larger cake.

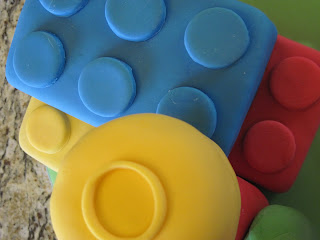
This cake, while my toughest project yet, was still fun to make. I enjoyed determining the logistical assembly of the Lego man and the building blocks. The carrot cake tasted delicious, so I was happy to use it rather than the more standard vanilla or chocolate.
During this process, I confirmed without any hesitation that I am my toughest critic. The moments leading up to the presentation of your cake are always a bit stressful, in anticipation of everyone's reactions. All my worries were unfounded. When I revealed the cakes, they expressed such joy and excitement that clearly I had been overreacting.
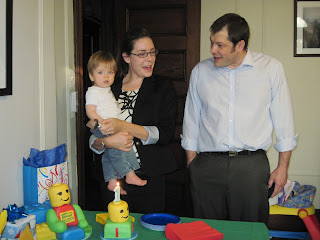

I was so thrilled to have had made this sweet little boy's first birthday cakes and so honored that my friends wanted me to do it for them. Furthermore, I was elated to see the delight in my friends' faces when they saw and then ate the cake. This is why I do what I do. Happy 1st Birthday, Elliott! We love you.

Thursday, December 22, 2011
Cookie Swap Recipe: Dulce de Leche Sandwich Cookies
I'd have to say the crowning achievement of my cookie swap selection had to be this last cookie I am bringing to you. It's two dulce de leche cookies with a slather of creamy dulce de leche in between. Dulce de leche is similar to caramel. Where caramel is a concentrated sugar-water solution, dulce de leche is a concentrated sugar-milk solution. The result is a creamier more flavorful caramel that is the perfect accompaniment to most anything - cookies, cakes, fruit, a spoon.... Moreover, it's a complete cinch to pull together. Buy yourself a can of sweetened condensed milk. Open it. Pour it into an oven-safe casserole dish. Cover it tightly with aluminum foil. Set your oven to 425F. Put the condensed milk casserole dish into a larger, deeper oven-proof pan and fill this outer pan 1/2 way up the side of the smaller casserole with boiling water. Please be careful doing this. I usually pull out the rack in my oven half-way and put everything together there and then just slide in the rack when it's ready to bake.
Bake this for 1 1/2 to 2 hours. Replenish the water as necessary, keeping the level half-way up the side of the smaller dish. You will see the condensed milk become a caramel color. This is dulce de leche! It's that simple. Take out the dulce de leche and whisk fairly vigorously so as not to have a lumpy sauce. Let it cool completely and it can be stored in the refrigerator for up to one week. Alternately, you can purchase dulce de leche at your grocery store.
The dulce de leche sandwich cookies are one of the many things you can make with your dulce de leche. The cookie is fabulous on its own, but sprinkle a little sea salt before sandwiching each cookie and this cookie goes from fabulous to out of this world!

Dulce de Leche Sandwich Cookies
(Recipe from Baking: From My Home to Yours, Dorie Greenspan)
Ingredients:
2 1/2 c all-purpose flour
1 t baking soda
1/4 t salt
2 sticks (8 ounces) unsalted butter, room temperature
3/4 c dulce de leche, plus more for filling
3/4 c packed light brown sugar
1/2 c sugar
2 large eggs
Directions:
Preheat oven to 350oF and position a rack in the upper third of the oven. Line two baking sheets with parchment paper and set aside. In a medium bowl, whisk together the flour, baking soda and salt.
In the bowl of a stand mixer fit with a paddle attachment, beat the butter at medium speed until just softened and broken up a bit. Add the 3/4 c dulce de leche, brown sugar and granulated sugar. Beat on medium speed until light and fluffy, about 3 minutes. Add the eggs one at a time, beating to incorporate.
Reduce the mixer speed to low and add the dry ingredients all at once. Mix only until the flour is just incorporated. You may need to finish off the mixing with a big spatula.
Spoon the dough onto the lined baking sheets using a heaping teaspoon of dough for each cookie. The dough will be soft and this might be a bit messy. Leave 2 inches of space between each cookie.
Bake the cookies for 10 to 12 minutes. The cookies will be honey brown with a light crust, but still very soft when they come out of the oven. Let them rest on the cookie sheet for a minute or two before removing to cool.
Once the cookies are cooled completely, spread them with dulce de leche. You may sprinkle with sea salt (optional). Sandwich the cookies. Keep well wrapped for up to four days.
*How to make Dulce de Leche:
Set your oven to 425oF. Empty the contents of a can of condensed milk into an oven-proof casserole dish and cover tightly with aluminum foil. Place this dish within a larger dish with raised sides and fill the larger dish with water at least 1/2-way up the sides of the dish with condensed milk, providing a water bath for the condensed milk. Put this into the oven and bake for 1 1/2 to 2 hours. Replenish the water as necessary. When you take out the dulce de leche (remember, it will be very hot so be careful, especially when pulling the foil off!), whisk it for a few minutes until it becomes smooth. This may be stored in the fridge for up to 1 week.
Thursday, December 15, 2011
Cookie Swap Recipe: Rugelach
Hey everybody. So, you'll remember a few days ago I posted about my Cranberry White Chocolate Biscotti from my Cookie Swap last week. Well, here's the second cookie I baked for this fun party.
Looking for a nut-free Christmas cookie, or rather 3, was quite a challenge. Many of you well know that most cookies, especially around this time of year have some sort of nut component in them. But I wanted all my guests (including my nut-allergy ones) to be able to try all the cookies, so that was one of the rules that I made sure I put forth.
After poring through many cookbooks, I decided upon rugelach. Rugelach is a traditional Jewish cookie. It's got a flaky cream cheese based crust and its filling is usually some combination of cinnamon, nuts, chocolate, raisins and fruit preserves.
I made them omitting the nuts and with a chocolate, cinnamon and apricot preserve filling. I think they came out quite well and were a delicious addition to my cookie swap table.

Dough
2 1/2 c AP flour
1 1/2 T sugar
1/4 t salt
16 T unsalted butter, cut and chilled
8 oz cc, cut and chilled
2 T sour cream
Filling
1 c sugar
1 T ground cinnamon
2/3 c apricot preserves, processed smooth
1 c dark chocolate, chopped finely
Glaze
2 lg egg yolks
2 T milk
For the Dough-
Combine the flour, sugar in the bowl of your stand mixer or food processor. A food processor works better, but either will do the job well. Add the butter, cream cheese, and sour cream and carefully combine until the dough becomes crumbly – the size of cottage cheese. Do not over-mix this dough. If you do, it will not be flaky and pastry-like once baked. Place the dough on a clean counter space divide it into 4 equal portions. Press each one into a disk and then, using wax paper to sandwich the dough, roll it out to a rectangle about 9” long x 6” wide or until the dough is about 1/8” thick. Place in the freezer for 30 min. Alternately, you can make this dough ahead of time and store it in the freezer, tightly wrapped, at this stage until you need to make the cookies. The dough can be frozen at this point for up to a month.
For the Filling-
Combine the sugar and cinnamon. Remove the dough from the freezer and spread 2 T preserves, 1/4 c chopped dark chocolate, and 2 T cinnamon sugar over the top of the dough. Roll tightly into a log and slice ½” pieces. Place them 2" apart on parchment-lined cookie sheets. Freeze for 15 minutes. While the cookies are in the freezer, heat your oven to 375F.
Whisk the glaze ingredients. Take the cookies out of the freezer and brush them with the glaze. Bake the cookies until they start to brown on the edges and have puffed up a bit., about 20-21 minutes. Let the cookies cool.
This recipe makes about 35 cookies. These cookies may be stored at room temperature for up to 5 days or frozen for up to a month.
Looking for a nut-free Christmas cookie, or rather 3, was quite a challenge. Many of you well know that most cookies, especially around this time of year have some sort of nut component in them. But I wanted all my guests (including my nut-allergy ones) to be able to try all the cookies, so that was one of the rules that I made sure I put forth.
After poring through many cookbooks, I decided upon rugelach. Rugelach is a traditional Jewish cookie. It's got a flaky cream cheese based crust and its filling is usually some combination of cinnamon, nuts, chocolate, raisins and fruit preserves.
I made them omitting the nuts and with a chocolate, cinnamon and apricot preserve filling. I think they came out quite well and were a delicious addition to my cookie swap table.

Rugelach
(from the pages of Baking Illustrated)Dough
2 1/2 c AP flour
1 1/2 T sugar
1/4 t salt
16 T unsalted butter, cut and chilled
8 oz cc, cut and chilled
2 T sour cream
Filling
1 c sugar
1 T ground cinnamon
2/3 c apricot preserves, processed smooth
1 c dark chocolate, chopped finely
Glaze
2 lg egg yolks
2 T milk
For the Dough-
Combine the flour, sugar in the bowl of your stand mixer or food processor. A food processor works better, but either will do the job well. Add the butter, cream cheese, and sour cream and carefully combine until the dough becomes crumbly – the size of cottage cheese. Do not over-mix this dough. If you do, it will not be flaky and pastry-like once baked. Place the dough on a clean counter space divide it into 4 equal portions. Press each one into a disk and then, using wax paper to sandwich the dough, roll it out to a rectangle about 9” long x 6” wide or until the dough is about 1/8” thick. Place in the freezer for 30 min. Alternately, you can make this dough ahead of time and store it in the freezer, tightly wrapped, at this stage until you need to make the cookies. The dough can be frozen at this point for up to a month.
For the Filling-
Combine the sugar and cinnamon. Remove the dough from the freezer and spread 2 T preserves, 1/4 c chopped dark chocolate, and 2 T cinnamon sugar over the top of the dough. Roll tightly into a log and slice ½” pieces. Place them 2" apart on parchment-lined cookie sheets. Freeze for 15 minutes. While the cookies are in the freezer, heat your oven to 375F.
Whisk the glaze ingredients. Take the cookies out of the freezer and brush them with the glaze. Bake the cookies until they start to brown on the edges and have puffed up a bit., about 20-21 minutes. Let the cookies cool.
This recipe makes about 35 cookies. These cookies may be stored at room temperature for up to 5 days or frozen for up to a month.
Tuesday, December 13, 2011
Homemade Vanilla Update
A few months ago, I posted about making homemade vanilla. I had used four different beans (Madagascar, Tahitian, Mexican, and Indian) to make four different vanilla extracts and one blend. My alcohol of choice was white rum.
Well, it's been a couple of months, just the right steeping time for those beans and I've begun to use them in my baking. The results are phenomenal. Storebought vanilla is much harsher in flavor and scent when used in baking than homemade vanilla is. My homemade vanilla is subtle, smooth, and floral and just beautifully enhances my baked goods. Of course, I haven't mentioned that homemade vanilla is much more inexpensive than storebought. This is a project that is certainly worth the time and effort, in my opinion.
At my cookie swap held this past weekend, I gave out small samples of both my Madagascar and Tahitian vanilla extracts. I hope my friends can enjoy them as much as I have been lately.


Monday, December 12, 2011
Cookie Swap 2011
This year I decided to host a cookie swap. With just a few friends, it would be an intimate affair that we all needed - a respite from the harriedness of this time of the year. Preparation for this party was the hurdle though, having set a 3 cookie requirement and eliminating the use of tree nuts in these cookies. This party was my idea of fun - sitting around the table, eating sweet treats, and discussing baking! The cookies my lovely friends brought were amazing and quite varied and so much fun to taste and evaluate. I cannot wait for next year's swap.
The cookie I made is a Cranberry White Chocolate Biscotti. It's flavored with orange zest and this combination - white chocolate, cranberries, and orange - is really amazing. If you haven't tried it already, you must. The smells wafting from my oven while baking this cookie are truly bakery-worthy. The biscotti is perfect with a hot cup of coffee, tea, hot chocolate or any other warm drink you prefer. It's utterly dunkable - becoming soft and losing their crunch while retaining their structure, the white chocolate drizzle starting to melt slightly, as it absorbs just the right amount of liquid from your hot and cozy drink... mmmmmm.. cookie heaven.


The cookie I made is a Cranberry White Chocolate Biscotti. It's flavored with orange zest and this combination - white chocolate, cranberries, and orange - is really amazing. If you haven't tried it already, you must. The smells wafting from my oven while baking this cookie are truly bakery-worthy. The biscotti is perfect with a hot cup of coffee, tea, hot chocolate or any other warm drink you prefer. It's utterly dunkable - becoming soft and losing their crunch while retaining their structure, the white chocolate drizzle starting to melt slightly, as it absorbs just the right amount of liquid from your hot and cozy drink... mmmmmm.. cookie heaven.


Thursday, December 8, 2011
Christmas Cookie Blunders
Christmas cookies have become a tradition in our house almost as important as putting up the tree and decorating it. The kids are excited to hear which cookies I've picked each year as the stars of our Christmas cookie lineup and even more so to sample them and have them easily accessible for the few weeks before this joyous holiday.
One of our favorite cookies are snowballs. They are melt-in-your-mouth little domes of sugary bliss. With ground nuts blended in, they are more commonly known as mexican wedding cakes. The powdered sugar incorporated into this dough makes them so delicate that they do indeed literally melt in your mouth. I think we all prefer the nutty versions of these cookies - as we prefer the nuttier versions of most everything (not limited to edible things)... :-) You can really use whatever nut you desire. My favorites are hazelnuts and almonds but pecans, walnuts, and pistachios would do well too.
One evening this week, my son, unaware of my excessively long list of things to do, requested homemade cookies. I couldn't turn him down because well, who in their right mind could turn down cookies? We were feeling the holiday spirit and Christmas isn't Christmas without cookies....! I asked him if he wanted snowballs and he eagerly said yes. After searching high and low for my recipe and not having any luck I decided to throw together the ingredients from memory and cross my fingers.
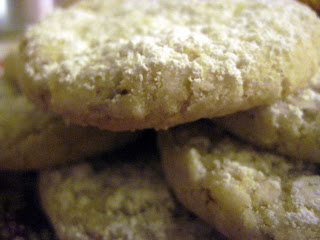
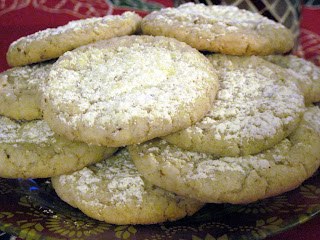 As you can plainly see from the picture above, the result was NOT a snowball nor a mexican wedding cake. The cookies spread in the oven causing them to look more like a traditional sugar cookie than anything else. Of course this is in part because I forgot to refrigerate the dough before throwing the cookies into the oven. In my defense, I was trying to make these cookies while figuring out what I was going to prepare for dinner, so I was a bit distracted. Nevertheless, the cookies spread and when I pulled them out and took a bite, I was pleasantly surprised by the result. The cookie was a crispy-on-the-outside, chewy-on-the-inside nutty sugary cookie that was quite delightful! To make sure I was not imagining it, I let the kids taste them. Though they were disappointed they didn't get the cute little powdered sugar-coated snowball shapes that they are so accustomed to at this time of year, they loved them and their samples disappeared before I could say "Time for dinner!" A happy accident! I was so pleased with this cookie that I have decided to share the recipe with all of you. In fact, I've added it to my cookie aresenal and I am excited to try it again with different nuts.

Leelabean's Nutty Snow Flurry Cookies
1/2 cup nuts, ground - pistachios, walnuts, hazelnuts, pecans, almonds (I used almonds, here)
1 cup confectioner's sugar
1 cup all-purpose flour
pinch of salt
1 stick unsalted butter, room temperature
1 tsp vanilla extract
more confectioner's sugar (for dusting)
Whisk together the ground nuts, confectioner's sugar, flour and salt in a bowl. Using an electric mixer, beat the butter and vanilla extract together until light. Slowly incorporated the flour/nut mixture until just combined. Roll into 1" balls and space evenly 2" apart on a greased cookie sheet. Bake for 12 - 15 minutes or until the edges start to lightly brown. Let the cookies rest for about 10 minutes on your counter. Dust the cookies with more confectioner's sugar and enjoy. This recipe makes 16 - 20 cookies.
One of our favorite cookies are snowballs. They are melt-in-your-mouth little domes of sugary bliss. With ground nuts blended in, they are more commonly known as mexican wedding cakes. The powdered sugar incorporated into this dough makes them so delicate that they do indeed literally melt in your mouth. I think we all prefer the nutty versions of these cookies - as we prefer the nuttier versions of most everything (not limited to edible things)... :-) You can really use whatever nut you desire. My favorites are hazelnuts and almonds but pecans, walnuts, and pistachios would do well too.
One evening this week, my son, unaware of my excessively long list of things to do, requested homemade cookies. I couldn't turn him down because well, who in their right mind could turn down cookies? We were feeling the holiday spirit and Christmas isn't Christmas without cookies....! I asked him if he wanted snowballs and he eagerly said yes. After searching high and low for my recipe and not having any luck I decided to throw together the ingredients from memory and cross my fingers.


Leelabean's Nutty Snow Flurry Cookies
1/2 cup nuts, ground - pistachios, walnuts, hazelnuts, pecans, almonds (I used almonds, here)
1 cup confectioner's sugar
1 cup all-purpose flour
pinch of salt
1 stick unsalted butter, room temperature
1 tsp vanilla extract
more confectioner's sugar (for dusting)
Whisk together the ground nuts, confectioner's sugar, flour and salt in a bowl. Using an electric mixer, beat the butter and vanilla extract together until light. Slowly incorporated the flour/nut mixture until just combined. Roll into 1" balls and space evenly 2" apart on a greased cookie sheet. Bake for 12 - 15 minutes or until the edges start to lightly brown. Let the cookies rest for about 10 minutes on your counter. Dust the cookies with more confectioner's sugar and enjoy. This recipe makes 16 - 20 cookies.
The Traveling Cookie
Last month I did something I'd never done before. I shipped my sugar cookies cross-country. My aunt had requested a bunch of Thanksgiving/Fall-inspired cookies to give to her friends for the holidays. I was excited to do the job, but wary of the potential result - cookies ending up on her doorstep in pieces...
But where there is a will, there's a way. So, I baked my cookies in three flavors - vanilla, chocolate, and gingerbread - and then wrapped them in cellophane bags. I purchased foam sheets, boxes, tissue paper, bubble wrap and peanuts. Overkill? Possibly.


I wrapped everything up in a box and must have written FRAGILE - FOOD ITEMS on the box about 20 times. I said a prayer and shipped them off. After what seemed like forever (2 1/2 days), my aunt informed me that the cookies arrived and not a single one had broken! Imagine my relief!
I had read online that sugar cookies with royal icing were sturdy for shipping, but I don't use royal icing for my cookies (my icing tastes better and is not as rock hard - it's a secret recipe). Well, seeing is believing and now I feel confident enough to ship my sugar cookies anywhere and have them arrive in one beautiful piece!
Subscribe to:
Posts (Atom)